Curtains make a room but only when done right. From choosing the right fabric stuff to measuring with surgical precision, every decision is close to your perfect set of drapery. The heading style no matter what it is, does not look good according to your aesthetic taste till it does not fulfill its functional destiny. Here, we are going to discuss back tab curtains and their work.
Back tab curtains
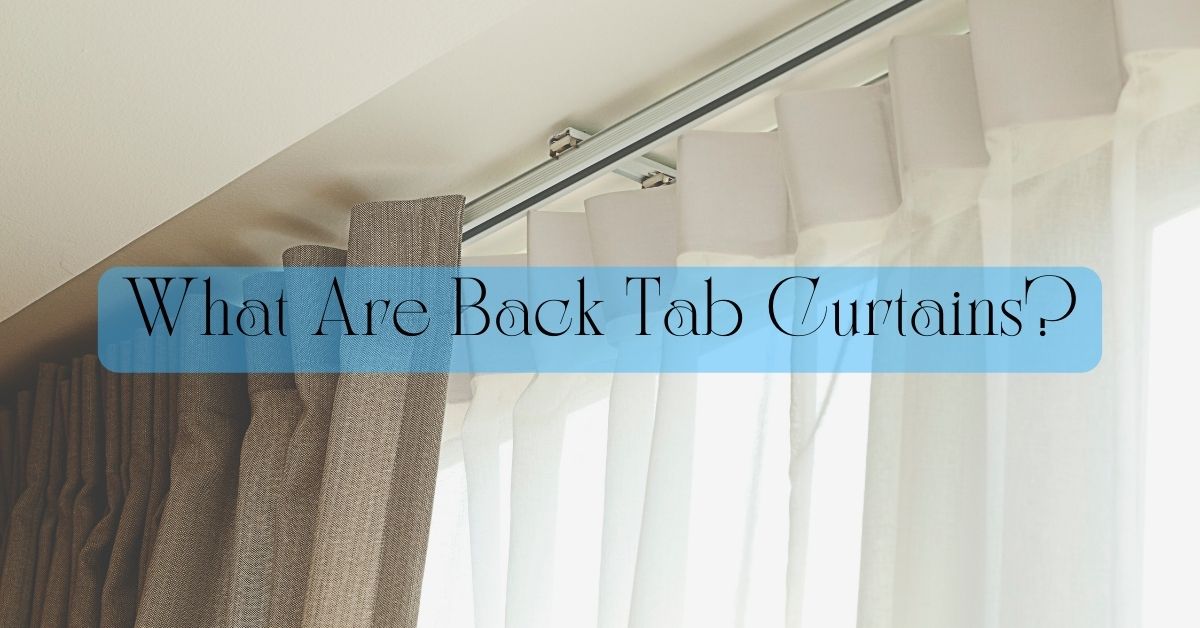
Back tab curtains are also called hidden tab curtains. Back tab curtains have tabs or loops sewn onto the back of the curtain header. The rod slips through the tab so that neither is visible from the front. It gives the illusion of the curtain floating in space and creates an elegant, clean line.
What are the Tabs on the back of the curtain?
Back tab curtains hang from the tabs hidden on the back of the curtain panel. They have a seamless look from top to end line, that can adjust in any style. When the curtains, the tabs create pleats the curtain looks elegant and nice. The tabs do not glide along the rod easily as rings therefore lightweight fabric must be chosen for this type of curtain.
Benefits of Back tab curtains
1. Tailored look: Back tab curtains have a tailored look without the mess of clips or pins. They have tabs or loops sewn onto the back of the header where the rod can slip neatly, and unseen from the front. It creates the illusion of floating curtains that look elegant and clean.
2. Versatility: Back tab curtains control different problems such as light control and privacy. This characteristic makes it a popular choice for rooms with abundant natural light.
3. Stylish appearance: The hidden tabs design adds a stylish and streamlined touch to the curtains. It is suitable for achieving a contemporary look.
4. Smart choice: Traditional, modern, or contemporary, no matter what your personal interior design style preference, back tab curtains are a smart choice because they can easily adjust in any decor setting.
Negative sides of the back tab curtain
1. Hard to open: Back tab curtains are suitable if you do not want to open and close drapes very often because fabric rests directly on the rod, it may be difficult to slide the tabs over the pole. To help keep the tabs straight, flat rods should be used instead of round ones.
2. Non-formal: Back tab curtains fit in any style from traditional to contemporary but still they are not too formal.
How to sew back tab curtains?
Step 1: Measure and cut the fabric
First of all, a determination is necessary for how tall and wide you want your curtains. To determine the length to cut your main fabric, add 10″ to your desired finished length. You may want to add an extra inch so when you hem the bottom, you will have a little extra wiggle room to get the curtain to fall exactly where you want. Add 3″ to your desired finished width of each panel. Then cut the lining to the finished dimensions of the panels.
Step 2: Make the tabs
Cut 4.5″ * 6″ pieces for the tabs. The finished tabs will be 2″ wide. Fold one of the pieces in half with the right side facing. Sew along the raw edge with a 1\4″ seam. Stitch the back side at the beginning and the end. Turn the tube right side out. Put the seam in the center and iron it flat. Repeat for the rest of the tabs and set them outside.
Another option is to use a wide ribbon, cut into 6″ lengths to make the tabs since they”‘ll be hidden once hung.
Step 3: Pin fabric and lining
With the main fabric facing down, center the lining with 5″ on the end and 1.5″ on the sides, around all sides.
Step 4: Sew the sides and bottom
On the sides, fold over the edge 3\4″ and iron. Then fold it over 3\4″ again, iron, and re-pin. Sew down the length about 1\8″ to 1\4″ from the inside fold. Repeat for the other side. For the bottom hem, fold the fabric in 1″ and iron. Then fold it over again another 4″ and iron.
If you want a double-folded hem, which will add a little more weight to the bottom, fold the fabric over 4″ twice instead. Just account for this when cutting the length of the fabric. Starting at the bottom corner, sew up the sides. Pivot at the top of the fold, and sew across to the next corner. Pivot again and sew along the side to the bottom corner.
If you want to make sure the bottom of the curtain falls exactly where you want, leave the bottom hem to the last step and hang the panel first then you will know exactly how much to hem.
Step 5: Sew top and tabs
Repeat the same steps for the top and bottom, but stop before sewing. Fold over the end of a tab 1″ and iron. Take the folded end and tuck it under the bottom edge of the top fold. Do the same for the rest, spacing them out evenly. Pin in place. Then fold under the top end of the tab so it’s even with the top of the curtain. Then iron and pin. Repeat for the rest of the tabs. Finally, sew around all the sides of the top to secure the tabs. The curtain panel is complete.
The final words:
Every type of curtain is perfect to hang when it completes its functional destination. Back tab curtains are semi-formal but more elegant, stylish, modern, traditional, and classy too. They are suitable for rooms to make them classy in any decor setting.


